What is the Offset Function?
You can read about the excel offset function here – there are several examples and explanations showing how the different parts of the offset function work. This page is going to show an example of a dynamic print range.
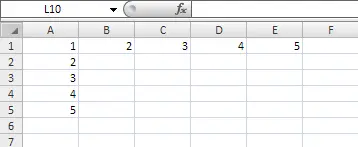
Excel Offset Function Dynamic Print Range
The Formula
 The formula is =Offset(Reference,Rows,Cols,Height,Width)
For dynamic printing, in this example, we’re only using the pieces that are bold. We’re going to use the COUNTA formula for both the Height and Width. The COUNTA formula counts non-blanks.
Download the example file below and/or follow the 4 steps to set up a dynamic print range in your excel document.
Offset Function Dynamic Print Download
Download 37.50 KB 973 downloadsStep 1
Step 2
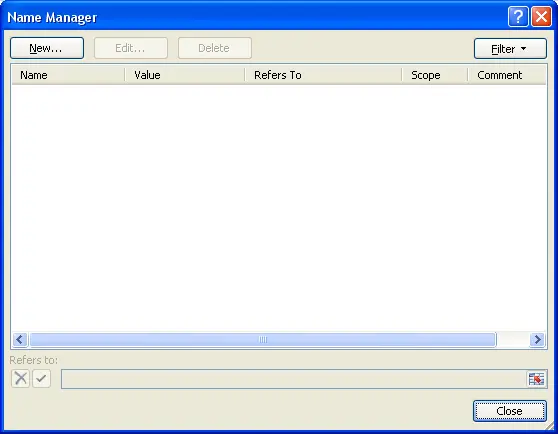
Give it the following name:
‘Print_Range’ (no apostrophes)
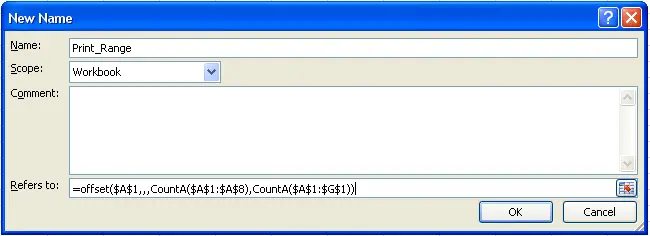
Enter the following formula:
=OFFSET(Sheet1!$A$1,,,COUNTA(Sheet1!$A$1:$A$8),COUNTA(Sheet1!$A$1:$G$1))
In this example, we’re only going to cell A8 and G1; however, you’ll want to make this range large enough so that it will capture all potential data that could be entered. For example, if we knew there would never be any more rows, but there might be more columns we might change the COUNTA(Sheet1!$A$1:$G$1) to COUNTA(Sheet1!$A$1:$AB$1). Also, we’re starting the formula on Cell A1, but this can be changed to any location in the spreadsheet, or you could replace the the COUNTA function with some other function or cell reference that provides the right height and width.
Step 4
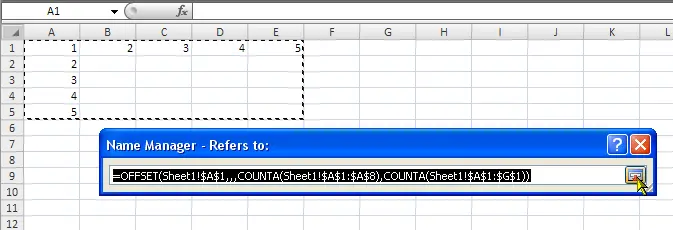 Check the formula entered to ensure it’s working correctly. You can do this by clicking the ‘Refers To’ button as shown in the picture. You can see if it works by the dancing line. If the line is surrounding the data you desire, then the formula works. If it’s not, then there is an error in the formula.
You can tell this formula works because it refers to cells going out to G1 and down to A8, but the line is only around the cells that have amounts (and everything in between).